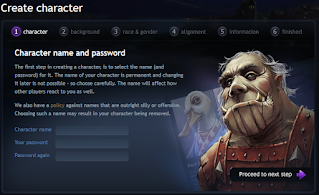
Batmud Tutorial Walkthrough (Part 1)
Continent: Laenor
Description:
- Welcome to Batmud! This guide provides a walkthrough of the very first area you'll encounters
- You can also participate in this tutorial even if you are not a new character. Just go to the northern gatehouse in Dortlewall and enter the portal.
Equipment:
Map:- A small mithril ring
- Reward for completing this first part of the tutorial
- Only works for players level 25 or lower. For those players though this is one of the best pieces of equipment in the game!
- +1 WIS, +1 STR, +1 DEX, +1 CON, +1 INT, +shoots occasional shocking grasp

Notes:
The Beginning:
- The first quest you will have is to collect all the pages of the tutorial
- You can read the tutorial pages with the command "tutorial #" with # being the number of the page.
- Initially you'll only be able to read tutorial 1 (Tutorial)
- In the next room you find a thick electrum ring
- You will also find tutorial 13 (Item Saving).
- I would recommend using the commands "get ring" and "wear ring"
- Note: This ring will not survive reboots. So when you log back on the next day it will be gone.
- The ring grants you the spell "Shocking grasp" which is a newbie mage spell. This may be less helpful if you picked the nomad background. It also grants the skill "Punch" for melee characters.
- In the next room you will find tutorial 14 (Handling Equipment).
- You will find tutorial 2 (Killing) in the next room along with a bandit.
- Might as well kill them [[shrugs]] ;p
- When you kill the bandit, you will get a map and tutorial 3 (looting the corpse).
- Note: This highlights that your "rip_action" is currently set to "get all from corpse;dig grave". This means you will automatically take all from the corpse and then bury it.
- Note: You can can leave your rip_action enabled for now, but eventually you may want to turn it off using "rip action off" so you don't pick up all sorts of junk, or annoy players in your party.
- In the next room you will find tutorial 4 (Knowing Yourself)
- You may notice you have more exp than what you got for killing the bandit. You are also earning some experience for exploring when doing the tutorial.
- Next up is a fork in the path where you have three directions to choose from.
- SW goes to the bandit camp
- S goes to the scenic overlook
- SE goes to the paladin camp
- Don't worry too much about which path to pick, but you will have to choose if you help the paladins or the bandits. You technically can't do both without having the wizard rewind time.
- There is no long term impact from the choice. You will just need to pick one of the paladins or bandits. The south path will let you continue once you have completed one of the quests
The Bandit Outpost (SW):
- Going along this path will start a quest to help the bandits. You will also find tutorial 200 (lost map).
- Rather than kill the bandit in the camp, you can instead "give map to bandit"
- When you do this the bandit says: 'Password, that be kalacucco, now get lost.'
- Note: This password may be randomly generated. So you may have a different one.
- Don't forget to pick up the silver coins!
Paladin Camp (SE):
- Going along this part will start a quest to help the paladins.
- The paladin wants the map too. The result will largely be the same as if you had given it to the bandit.
- I helped the bandits so I don't know what the knight says.
Scenic Overlook (S):
- Somewhere around this time I learned tutorial 15 (Observing), and tutorial 201 (Part 1: lost password)
- Note: This is one of the first "hidden" secrets of Batmud.
- Look at scenery
- Look at trees
- Look at nest
- Hey, guess what, you can "climb tree" to take a closer look!
- When you do this, you will find a mithril coin (worth 500 gold!)
- You will also find tutorial 301 (Bird's nest)
- In the next room is a wizard in light blue robes.
- "ask wizard about password"
- You can then enter an interactive chat with the wizard by typing "talk to wizard"
- Next say the password to pass the wizard.
- If you don't want to do that, you can always kill the wizard. I tried this for "science" and he wasn't that hard for a Nomad Giant but he may be difficult if you are a mage. He cast vacuum bolt and can take more damage than the bandits.
- In the next room you find that it has been blocked by rubble. You will also find tutorials 52 (More), and tutorials 202 (Part 1: stuck at mountain)
- look at rubble
- look at lever
- pull lever
Finishing up Part 1 of the Tutorial (Inside the mountain, and traveling to Dortlewall):
- There is a torch on the ground, but you probably have one in your inventory as well
- You can "light torch" to create light
- Your newbie crystal can also give off light. You can do this using the command "crystal light"
- The next room will be dark, and it will not let you go into the room unless you can see
- The next room has two goblins, and you find tutorial 8 (Targeting). Also around this time I found tutorial 203 (Part 1: lost newbie crystal).
- You only need to kill the big goblin to pass. But killing both of them is pretty easy
- There is an aggressive goblin in the next room.
- Don't worry, they are very easy to kill
- You will also find tutorial page 9 (Aggressive monsters)
- Leaving this room you are now outside with a campfire
- You can "douse torch" to turn it off. Torches will run out so this is a way to preserve them.
- You can sleep to rest up and heal. This isn't necessary though.
- Note: You can only sleep by campfires. You will also likely replace this skill with a better one from your guild/background.
- I would strongly recommend following the advice in the room description and leveling up by using the command "advance level"
- At this point I had around 36k exp, so I could keep doing this to advance to level 9!
- Talk about a quick promotion!
- One thing to highlight, as you advance for the first 10 levels, you'll automatically learn new skills and spells. Type "show spells", and "show skills" to see what you can do.
- Getting near the end of part 1 of the tutorial. In the next room you find tutorial 11 (Skills and spells)
- See the discussion about skills/spells in the previous note!
- In the next room you enter a field with a scarecrow. You also find tutorial 12 (Use and cast) and tutorial 204 (Part 1: skills and spells explained)
- Kill the scarecrow.
- A wolf in the next room blocks your progress into the village
- Kill the wolf.
- Once you do, you'll find tutorial 101 (wolfslayer)
- Note: This tutorial sets up the next set of quests: Find out more about wolves, and find the true master of the ring you have.
- Also, you might be able to advance another level now. I was able to make it to level 10!
- Going into the next room, the guards will lock the gate back outside.
- Congratulations on completing the first section of the tutorial!
- There is no going back. Ok, that is a lie. If you go south and then come back north you will see a portal in the room. This is the game switching the room over from the new player tutorial to the bigger city of Dortlewall. To retake the portal, type "enter portal"
- In the next room Dawnmist the dryad welcomes you and asks you to give them your ring so they can deliver it to master Tayrien.
- She will not let you pass until you give her the ring
- This is also a no skill/spell room so you can not attack/kill her. You need to give her the ring.
- Giving her the ring will unlocks tutorial 98 (Quitting), tutorial 102 (Destination: ivory tower), and tutorial 225 (Continuing after taking a break).
- Your starting location will also be set to this room.
Part 2 of the Tutorial (Dortlewall):
- Follow this link to see a guide for part 2 of the tutorial and talk about Dortlewall
Kill Tracker:
- Bandit
- 152 exp
- A bandit, guarding the outpost
- 249 exp
- A wizard in light blue robes
- 767 exp
- Drops a wood staff
- A big goblin
- 221 exp
- A small goblin
- 148 exp
- An angry goblin
- 185 exp
- A scarecrow, keeping the crows at bay
- 215 exp
- A hungry wolf, stalking the countryside
- 370 exp


Comments
Post a Comment